thinkphp6.0如何使用kindeditor(一)
来源:WX部落
文章通过实战讲解如何在thinkphp6.0中使用kindeditor,相信通过阅读本文,你将掌握如何在thinkphp6.0中使用kindeditor的方法。实战代码已在github上共享,需要的小伙伴可以自取。
本文主要讲解thinkphp6.0如何整合kindeditor,通过阅读本文,你可以掌握thinkphp6.0使用kindeditor的方法。
1、首先安装一个tp6的项目
composer create-project topthink/think kindeditor
2、下载kindeditory源码,本文写作时,最新版本为4.1.12
https://github.com/kindsoft/kindeditor/releases
将下载的源码解压缩后,看到如下图所示目录结构,只保留红框中的部分就可以,将其他部分删掉即可

然后将kindeditory目录,复制到刚创建的tp6项目的public/static下面
3、安装模板引擎
composer require topthink/think-view
4、在app\controller\Index.php中添加一个测试方法index
<?php
namespace app\controller;

use app\BaseController;
use think\facade\View;

class Index extends BaseController
{
    /**
     * Notes: 测试kindeditor编辑器
     * Author: 陈宁
     * Website: http://wxbuluo.com
     * DateTime: 2021/12/24 11:33
     * @return string
     */
    public function index()
    {
        if($this->request->isPost()){
            // 打印编辑器输入的内容
            dump($this->request->post('content'));
        }else{
            return View::fetch('index');
        }
    }
}
5、创建一个模板app\view\index\index.html
<!DOCTYPE html>
<html lang="en">
<head>
    <meta charset="utf-8">
    <meta name="viewport" content="width=device-width, initial-scale=1">
    <title>Title</title>
    <link rel="stylesheet" href="https://cdn.staticfile.org/bootstrap/5.1.3/css/bootstrap.min.css">
    <style>
        #editor_id {
            width: 50vw;
            height: 50vh;
        }
    </style>
</head>
<body>
<div class="container-fluid">
    <div class="row">
        <form action="" method="POST">
            <textarea id="editor_id" class="form-control" name="content"></textarea>
            <button type="submit" class="btn btn-primary">Submit</button>
        </form>
    </div>
</div>

<script src="/static/kindeditor/kindeditor-all-min.js"></script>
<script>
    var editor;
    KindEditor.ready(function (K) {
        editor = K.create('#editor_id', {
            /*上传接口*/
            uploadJson: '/static/kindeditor/php/upload_json.php'
        });
    });
</script>
</body>
</html>

6、kindeditory给我们提供了一个上传接口的示例,就是/static/kindeditor/php/upload_json.php,我本地测试的php环境为php7.3.9,这个文件中的部分代码已不适用,我稍微修改了一下,主要是返回json部分的代码。这里我们主要关注一下文件上传的路径,这里我们上传到了/public/uploads下面,大家记得要在public下面先创建uploads文件夹,我的测试环境为windows,不存在写入权限的问题,如果是linux,或者mac,需要给文件夹以写入权限
<?php
/**
 * KindEditor PHP
 *
 * 本PHP程序是演示程序,建议不要直接在实际项目中使用。
 * 如果您确定直接使用本程序,使用之前请仔细确认相关安全设置。
 *
 */

//require_once 'JSON.php';
$php_path = dirname(__FILE__) . '/';
$php_url = dirname($_SERVER['PHP_SELF']) . '/';

//文件保存目录路径,这里我们上传到/public/uploads/下面
$save_path = $php_path . '../../../uploads/';
//文件保存目录URL
$save_url = $php_url . '../../../uploads/';

//定义允许上传的文件扩展名
$ext_arr = array(
	'image' => array('gif', 'jpg', 'jpeg', 'png', 'bmp'),
	'flash' => array('swf', 'flv'),
	'media' => array('swf', 'flv', 'mp3', 'wav', 'wma', 'wmv', 'mid', 'avi', 'mpg', 'asf', 'rm', 'rmvb'),
	'file' => array('doc', 'docx', 'xls', 'xlsx', 'ppt', 'txt', 'zip', 'rar', 'gz', 'bz2'),
);
//最大文件大小
$max_size = 1000000;

$save_path = realpath($save_path) . '/';

//PHP上传失败
if (!empty($_FILES['imgFile']['error'])) {
	switch($_FILES['imgFile']['error']){
		case '1':
			$error = '超过php.ini允许的大小。';
			break;
		case '2':
			$error = '超过表单允许的大小。';
			break;
		case '3':
			$error = '图片只有部分被上传。';
			break;
		case '4':
			$error = '请选择图片。';
			break;
		case '6':
			$error = '找不到临时目录。';
			break;
		case '7':
			$error = '写文件到硬盘出错。';
			break;
		case '8':
			$error = 'File upload stopped by extension。';
			break;
		case '999':
		default:
			$error = '未知错误。';
	}
	alert($error);
}

//有上传文件时
if (empty($_FILES) === false) {
	//原文件名
	$file_name = $_FILES['imgFile']['name'];
	//服务器上临时文件名
	$tmp_name = $_FILES['imgFile']['tmp_name'];
	//文件大小
	$file_size = $_FILES['imgFile']['size'];
	//检查文件名
	if (!$file_name) {
		alert("请选择文件。");
	}
	//检查目录
	if (@is_dir($save_path) === false) {
		alert("上传目录不存在。");
	}
	//检查目录写权限
	if (@is_writable($save_path) === false) {
		alert("上传目录没有写权限。");
	}
	//检查是否已上传
	if (@is_uploaded_file($tmp_name) === false) {
		alert("上传失败。");
	}
	//检查文件大小
	if ($file_size > $max_size) {
		alert("上传文件大小超过限制。");
	}
	//检查目录名
	$dir_name = empty($_GET['dir']) ? 'image' : trim($_GET['dir']);
	if (empty($ext_arr[$dir_name])) {
		alert("目录名不正确。");
	}
	//获得文件扩展名
	$temp_arr = explode(".", $file_name);
	$file_ext = array_pop($temp_arr);
	$file_ext = trim($file_ext);
	$file_ext = strtolower($file_ext);
	//检查扩展名
	if (in_array($file_ext, $ext_arr[$dir_name]) === false) {
		alert("上传文件扩展名是不允许的扩展名。\n只允许" . implode(",", $ext_arr[$dir_name]) . "格式。");
	}
	//创建文件夹
	if ($dir_name !== '') {
		$save_path .= $dir_name . "/";
		$save_url .= $dir_name . "/";
		if (!file_exists($save_path)) {
			mkdir($save_path);
		}
	}
	$ymd = date("Ymd");
	$save_path .= $ymd . "/";
	$save_url .= $ymd . "/";
	if (!file_exists($save_path)) {
		mkdir($save_path);
	}
	//新文件名
	$new_file_name = date("YmdHis") . '_' . rand(10000, 99999) . '.' . $file_ext;
	//移动文件
	$file_path = $save_path . $new_file_name;
	if (move_uploaded_file($tmp_name, $file_path) === false) {
		alert("上传文件失败。");
	}
	@chmod($file_path, 0644);
	$file_url = $save_url . $new_file_name;

	header('Content-type: text/html; charset=UTF-8');
//	$json = new Services_JSON();
//	echo $json->encode(array('error' => 0, 'url' => $file_url));
	echo json_encode(['error'=>0,'url'=>$file_url]);
	exit;
}

function alert($msg) {
	header('Content-type: text/html; charset=UTF-8');
//	$json = new Services_JSON();
//	echo $json->encode(array('error' => 1, 'message' => $msg));
	echo json_encode(['error'=>1,'message'=>$msg]);
	exit;
}
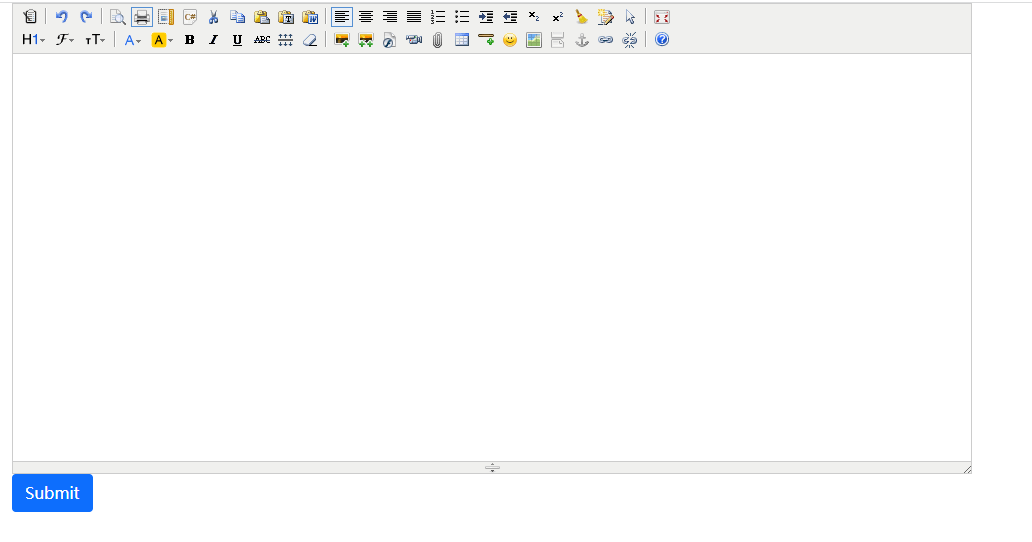
7、输入点内容测试一下,或者上传个图片测试一下
声明:
① 凡本网所有原创文章及图片、图表的版权均属WX部落所有,如需转载,需注明“信息来源:WX部落”,并且添加本文地址:http://wxbuluo.com/index/article/37.html
② 凡本网注明“来源:XXX(非WX部落)”的文字及图片内容,均转载自其他媒体,版权归原媒体及作者所有。转载目的在于传递更多的资讯,并不代表本网赞同其观点和对其真实性负责。如有侵权,请联系删除。联系方式:296720094@qq.com
③ 本网站的资源部分内容来源于网络,仅供大家学习与参考,如有侵权,请联系站长296720094@qq.com进行删除处理。
④ 部分项目课程具有时效性,如发布时间较长请搜索相关课程选择发布时间最近的查看。
⑤ 部分具有时效性的项目课程文章,我们会逐步转移到免费类分类开放下载。同时免费分类链接失效不补!
⑥ 本站资源大多存储在云盘,如发现链接失效,请联系我们我们会第一时间更新。
相关文章推荐:


